Car scratches are inevitable. Whether it’s a careless driver, a parking mishap, or a stray shopping cart, scratches can make your car look older and decrease its resale value. The good news? Many minor scratches can be fixed at home—no expensive body shop required. In this guide, we’ll walk you through how to fix car scratches yourself, what products to use, and when it’s better to call a pro.
🚗 Types of Car Scratches
Before you dive into fixing the scratch, it’s important to know what type of scratch you’re dealing with. There are typically three main types:
- Clear Coat Scratch – This is the most common and the easiest to fix. It only affects the topmost layer.
- Paint Scratch – These go through the clear coat and damage the actual paint layer.
- Primer or Deep Scratch – The most serious. These reach the primer or even the bare metal, requiring more work.
Run your fingernail across the scratch. If your nail catches, it’s likely deeper than just the clear coat.
🧰 DIY Products You’ll Need
For most light-to-medium scratches, here’s what you’ll need:
- Microfiber cloths
- Soap and water
- Scratch repair kit or compound (like Meguiar’s, Turtle Wax, or 3M)
- Polishing compound
- Car wax or sealant
- Sandpaper (for deeper scratches, 2000 to 3000 grit)
- Touch-up paint (for deep scratches only, matched to your car’s paint code)
🛠️ Step-by-Step: How to Fix Minor Car Scratches
Step 1: Wash the Area Thoroughly
Use soap and water to clean the scratched area. Dirt can make scratches worse during buffing.
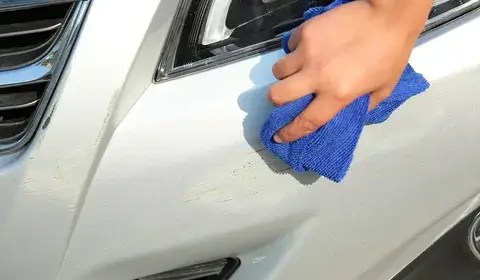
Step 2: Use Scratch Remover or Compound
Apply a small amount of scratch remover compound onto a microfiber cloth. Rub it into the scratch using circular motions for 30–60 seconds. Wipe away the excess with a clean cloth.
Step 3: Polish the Area
After buffing, use a polishing compound to restore the shine. This step smooths out the area and blends it with the rest of the paint.
Step 4: Apply Wax or Sealant
Finish by applying a car wax or sealant. This protects the area and adds a glossy finish.
🧪 For Deeper Scratches
If the scratch has gone through the paint:
- Sand the Area Lightly – Wet-sand using 2000-grit sandpaper to smooth the edges.
- Apply Primer (if needed) – Let it dry fully.
- Touch-Up Paint – Use a fine brush and build layers slowly. Allow proper drying between coats.
- Clear Coat Layer – Apply a clear coat to seal the paint.
- Polish & Wax – Once fully dry, polish the area and apply wax.
Matching your car’s paint code (usually found on the door frame or manual) is crucial for a seamless finish.
🛑 When to Skip DIY and Call a Pro
- The scratch is too deep and shows bare metal
- The damaged area is large or in a high-visibility spot
- You’re unsure about sanding or painting
- Your vehicle is under warranty and repairs need certification
✅ Final Tips
- Always work in a shaded, dust-free area
- Take your time—rushing can make the scratch worse
- Don’t over-polish, or you’ll remove too much clear coat
- Use quality products for best results

Leave a comment